
Black & Decker Air Fry Toaster Oven Manual: A Comprehensive Guide
This manual details safe operation of your Black & Decker air fry toaster oven, covering toasting, baking, broiling, and air frying instructions for optimal results․

Welcome! This Black & Decker air fry toaster oven offers versatile cooking capabilities, combining air frying, baking, broiling, and toasting in one convenient appliance․ Carefully review this manual to understand its features and ensure safe, efficient operation․

This guide provides essential instructions for preparing delicious meals with ease․ From quick snacks to full-course dinners, explore the possibilities! Remember to retain this manual for future reference and troubleshooting․ Enjoy exploring the world of crispy, flavorful cooking!
Safety Precautions
Important: Read all instructions before using your Black & Decker air fry toaster oven․ To prevent fire, electrical shock, and injury, adhere to these safety guidelines․ Never immerse the appliance in water․ Ensure proper grounding to avoid electrical hazards․
Do not operate with a damaged cord or plug․ Supervise children when the oven is in use․ Allow the oven to cool completely before cleaning․ Use oven mitts to prevent burns․ Always unplug when not in use․

Important Safety Instructions
Caution: Hot surfaces can cause burns․ Always use oven mitts when handling hot components․ Never leave the appliance unattended during operation; Ensure adequate ventilation during use․ Do not place flammable materials near the oven․
This appliance is not intended for use by persons with reduced physical, sensory, or mental capabilities․ Keep the appliance and its cord away from water and heat․ Always unplug before cleaning or storing․
Electrical Safety Guidelines
Warning: To avoid electrical shock, do not immerse the cord, plug, or appliance in water․ Operate only with a properly grounded outlet․ Never use an extension cord unless absolutely necessary and it’s rated for the appliance’s wattage․
Inspect the cord regularly for damage; discontinue use if damaged․ Do not operate if the appliance exhibits any malfunction․ Unplug from the outlet when not in use and before cleaning․
Understanding the Components
Your Black & Decker air fry toaster oven consists of an exterior housing, control panel, oven cavity, and included accessories․ Key exterior parts include the housing, door, and crumb tray․ Interior components feature a heating element, rack, and baking pan․
Familiarize yourself with each part before operation․ Proper understanding ensures safe and efficient use of all functions, from air frying to traditional baking and toasting․
Oven Exterior Parts
The exterior of your Black & Decker air fry toaster oven features a durable housing protecting internal components․ A glass door allows visibility during cooking․ The control panel, with its function selector knob, manages settings․ A removable crumb tray simplifies cleaning, catching fallen food particles․
These external features are designed for user convenience and safe operation․ Regular inspection ensures optimal performance and longevity of your appliance․
Interior Components & Accessories
Inside your Black & Decker air fry toaster oven, you’ll find a spacious cooking cavity designed for versatile meal preparation․ Included accessories typically feature a baking pan, a wire rack, and an air fry basket․ These components facilitate various cooking methods, from traditional baking to crispy air frying․
Proper placement of these accessories is crucial for even cooking․ Refer to the operating instructions for optimal use․
Getting Started: Initial Setup
Before your first use, carefully unpack your Black & Decker air fry toaster oven and remove all packaging materials․ Thoroughly clean the interior and accessories with warm, soapy water, then dry completely․ It’s essential to record your appliance’s serial number, typically found on the bottom or back, for warranty purposes․
This initial setup ensures a safe and hygienic cooking experience․ Always read the instructions!
Before First Use: Cleaning & Preparation
Prior to initial use, remove all labels, stickers, and packaging from your Black & Decker air fry toaster oven․ Wash the baking pan, air fry basket, and any included racks with hot, soapy water․ Rinse thoroughly and dry completely․ Wipe down the oven’s interior and exterior with a damp cloth․
This process eliminates manufacturing residue and prepares the oven for safe and effective cooking․ Ensure all parts are dry before use․
Recording Your Serial Number
Locate the serial number label on your Black & Decker air fry toaster oven – typically found on the rear or bottom of the appliance․ Carefully record this number in the space provided below for future reference․
Retaining the serial number is crucial for warranty claims, customer support inquiries, and identifying your specific model․ Keep this manual and the recorded serial number in a safe, accessible location․
Operating Instructions: Core Functions
Your Black & Decker air fry toaster oven offers versatile cooking functions․ Familiarize yourself with the function selector knob to choose between toasting, baking, broiling, and air frying․
Precise temperature and timer settings are essential for optimal results․ Refer to the dedicated guides for each function – toasting, baking – to ensure perfectly cooked meals every time․ Always preheat as recommended․
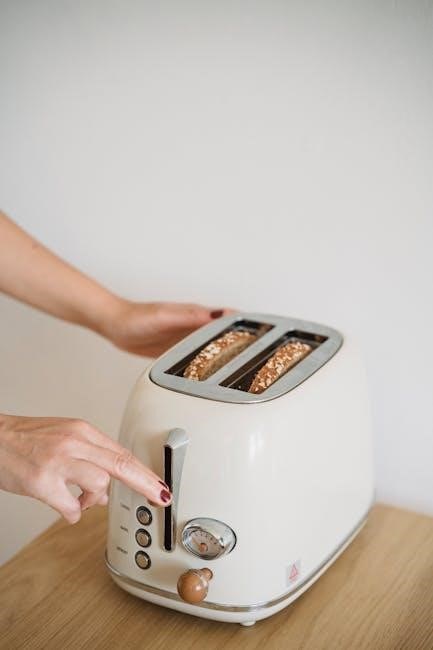
Toasting Guide & Settings
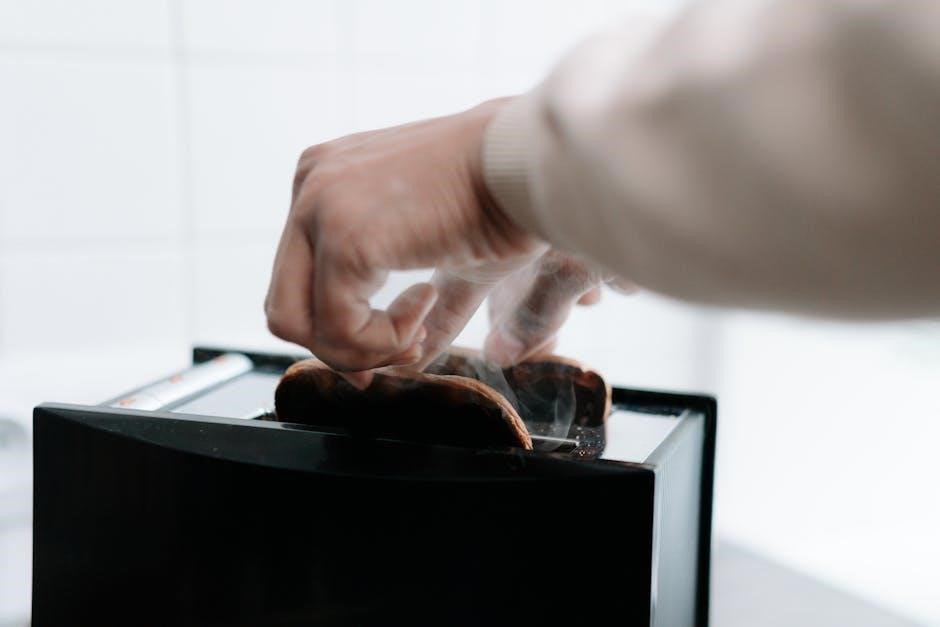
For perfect toast, select your desired darkness level using the function selector knob․ Start with a medium setting and adjust accordingly․ Different bread types require varying toasting times; thicker slices need longer durations․
Monitor the toasting process to prevent burning․ The guide provides suggested settings for white bread, wheat bread, bagels, and pastries․ Remember to adjust based on your preference and the oven’s initial temperature․
Baking Guide & Settings
For baking, utilize the function selector knob to choose the bake setting and set the desired temperature․ Preheat the oven for optimal results, ensuring even cooking․ Baking times will vary depending on the recipe․
Use oven-safe cookware and avoid overcrowding․ Regularly check food for doneness, adjusting baking time as needed․ The manual provides general temperature and time guidelines for common baked goods, like cookies and small cakes․
Air Fry Function: A Detailed Look
The air fry function utilizes rapid air circulation to cook food with little to no oil, resulting in crispy textures․ Select the air fry setting on the function selector knob and set the appropriate temperature and timer․
Preheating is recommended for best results․ Avoid overcrowding the basket for even cooking․ Consult the provided cooking times and temperatures guide for various foods, ensuring delicious and healthier meals․
Air Fry Cooking Times & Temperatures
For French fries, air fry at 400°F (200°C) for 15-20 minutes, shaking halfway through․ Chicken wings require 380°F (190°C) for 20-25 minutes, flipping once․ Vegetables typically need 375°F (190°C) for 10-15 minutes․
These are guidelines; adjust times based on quantity and desired crispness․ Always check for doneness using a food thermometer․ Refer to recipe sections for specific recommendations and optimal air frying outcomes․
Tips for Optimal Air Frying Results
For maximum crispness, avoid overcrowding the basket; work in batches․ Lightly coat food with oil for enhanced browning and texture․ Shake the basket halfway through cooking to ensure even heat distribution․ Preheating the air fryer is recommended for best results․
Don’t stack food, allowing hot air to circulate․ Use parchment paper liners designed for air fryers․ Regularly clean the basket to prevent smoke and maintain performance․
Broiling Function: Achieving Perfect Browning
The broil function delivers intense, direct heat for browning and finishing foods․ Position the rack closest to the heating element for maximum browning․ Always use oven-safe cookware, avoiding plastic or flammable materials․ Monitor food closely during broiling to prevent burning․
Keep the oven door ajar slightly for proper ventilation and temperature control․ For safety, never broil without the broiling pan in place to catch drippings․
Broiling Guide & Safety Considerations
Preheat the oven to the broil setting before placing food inside․ Use the highest rack position for most foods, adjusting for desired browning․ Always use an oven-safe pan and monitor closely to prevent burning․ Avoid using aluminum foil unless specifically instructed․
Never leave the oven unattended while broiling․ Be cautious of hot surfaces and use oven mitts․ Ensure proper ventilation and avoid flammable materials nearby for safety․
Using the Control Panel
The function selector knob allows you to choose between toasting, baking, broiling, and air frying modes․ Adjust the temperature using the dedicated dial, ensuring it matches your recipe’s requirements․ Set the timer accurately to prevent over or undercooking; it automatically shuts off when complete․
Familiarize yourself with each setting for optimal performance․ Refer to the cooking guides for suggested times and temperatures․ Precise control ensures consistently delicious results․
Function Selector Knob Explained
The function selector knob is central to operation, offering modes like ‘Toast’, ‘Bake’, ‘Broil’, and ‘Air Fry’․ Rotating the knob selects your desired cooking function․ Ensure it clicks firmly into place for proper activation․ Each setting optimizes heat distribution for specific food types․
‘Air Fry’ circulates hot air for crispy results, while ‘Bake’ provides even heating․ ‘Broil’ delivers intense top-down heat․ Always double-check the selected function before starting․
Temperature & Timer Settings
Adjusting temperature is crucial for perfect cooking; use the dial to select heat between 200°F and 450°F․ The timer, ranging up to 60 minutes, ensures precise cooking times․ For shorter tasks, like toasting, utilize the timer’s lower settings․ An auto-shutoff feature activates when the timer reaches zero․
Monitor food closely, especially during initial use, to fine-tune settings․ Preheating is recommended for baking and broiling․ Always return the timer to ‘off’ when finished․
Cleaning and Maintenance
Regular cleaning extends your oven’s life․ Always unplug before cleaning․ Allow the oven to cool completely․ Remove the crumb tray and accessories, washing them with warm, soapy water․ Wipe the interior with a damp cloth; avoid harsh abrasives․
For stubborn residue, a paste of baking soda and water can be effective․ Ensure all parts are dry before reassembly․ Never immerse the oven itself in water․
Regular Cleaning Procedures
After each use, unplug and allow the Black & Decker oven to cool․ Remove the crumb tray and wipe clean․ Wash accessories with warm, soapy water, then dry thoroughly․ Wipe the oven’s interior and exterior with a damp cloth․
Periodically, a more thorough cleaning is needed․ Remove racks and trays for a deeper wash․ Avoid abrasive cleaners that could damage surfaces․
Dealing with Stubborn Food Residue
For baked-on residue, create a paste of baking soda and water․ Apply to the affected area, let sit for 15-20 minutes, then gently scrub․ Avoid harsh abrasives that can scratch the interior․ For extremely stubborn spots, a specialized oven cleaner may be used, following its instructions carefully․
Ensure the oven is completely cool before cleaning․ Always rinse thoroughly to remove any cleaner residue before reuse․
Troubleshooting Common Issues
If the oven isn’t heating, check the power cord and outlet․ Ensure the function and temperature are correctly set․ For uneven cooking, rotate the food halfway through the cycle․ Avoid overcrowding, which restricts air circulation․ Verify the heating elements are clean and unobstructed․
If problems persist, consult the warranty information or contact customer support for assistance․ Never attempt to repair the oven yourself․
Oven Not Heating
If your Black & Decker air fry toaster oven isn’t heating, first verify the power cord is securely plugged into a functioning outlet․ Check if the outlet has power by testing with another appliance․ Ensure the function selector knob is set to a cooking function—toasting, baking, or air frying—and not ‘off’․
Confirm the temperature is set appropriately․ A faulty heating element may require professional service․
Food Not Cooking Evenly

Uneven cooking in your Black & Decker air fry toaster oven can stem from overcrowding the cooking space․ Ensure food isn’t touching the heating elements or oven walls․ Rotate the baking pan or air fry basket midway through the cooking cycle for more consistent results․
Consider using a lower temperature and extending cooking time․ Proper preheating is also crucial for even heat distribution․
Warranty Information
Black & Decker provides a warranty covering defects in materials and workmanship for a specified period from the purchase date․ Warranty coverage details, including duration and limitations, are outlined in the separate warranty document included with your air fry toaster oven․
To claim warranty service, retain your proof of purchase and contact Black & Decker customer support for instructions and authorized service locations․
Warranty Coverage Details
Black & Decker’s warranty typically covers defects in materials and workmanship under normal household use․ It does not cover damage from misuse, accidents, or unauthorized repairs․ The warranty period varies by product and region, often one to two years from the original purchase date․
This warranty offers repair or replacement of the defective unit at Black & Decker’s discretion․ Proof of purchase is essential for all claims․
How to Claim Warranty Service
To initiate a warranty claim, contact Black & Decker’s customer service with your model number, serial number, and proof of purchase․ You may be asked to troubleshoot the issue or provide photos/videos demonstrating the defect․
If a repair or replacement is approved, Black & Decker will provide instructions for returning the unit or arranging service․ Shipping costs may apply, and the customer is responsible for proper packaging․
Recipes & Cooking Ideas
Explore a world of culinary possibilities with your Black & Decker air fry toaster oven! Discover quick and easy air fry recipes for crispy fries, juicy chicken wings, and perfectly roasted vegetables․
Experiment with baking delicious cookies, cakes, and casseroles, or utilize the broil function for achieving golden-brown perfection․ Online resources offer numerous cooking times and temperatures for various dishes, expanding your mealtime options․
Quick & Easy Air Fry Recipes
Black & Decker makes cooking simple! Try air frying crispy chicken wings at 400°F for 20 minutes, or golden french fries at 380°F for 15 minutes․ For a quick snack, air fry mozzarella sticks at 350°F for 8-10 minutes․
Salmon fillets cook beautifully at 390°F for 12 minutes․ These recipes leverage the air fryer’s speed and efficiency, delivering delicious results with minimal effort – perfect for busy weeknights!
USDA Nutrient Database Reference
Black & Decker encourages healthy cooking! Refer to the USDA National Nutrient Database for Standard Reference for detailed nutritional information on your ingredients․ This database, accessible via the Agricultural Research Service, provides data on vitamins, minerals, and macronutrients․
Understanding nutritional content allows for informed meal planning․ The USDA resource (127 pages, 986KB) supports balanced diets and helps you optimize the health benefits of your air-fried creations․
Contact Information & Support
For assistance with your Black & Decker Air Fry Toaster Oven, please reach out to our dedicated customer service team․ Contact details are available within the manual’s cover or online․
We are committed to ensuring your satisfaction․ Should you require warranty service information, or have questions regarding operation, our support team is ready to assist․ Don’t hesitate to call the appropriate number listed for prompt help․
Customer Service Contact Details
For immediate support regarding your Black & Decker Air Fry Toaster Oven, please consult the manual’s cover for a toll-free number․ Alternatively, visit our official website for a comprehensive FAQ section and online chat support options․
Our dedicated team is available to address warranty claims, troubleshooting, and general inquiries․ We strive to provide prompt and efficient assistance to ensure your complete satisfaction with your appliance․
Leave a Reply
You must be logged in to post a comment.