Crosley offers a diverse range of record players, from retro vinyl models like the CR46 and Voyager, to modern Bluetooth turntables, catering to varied preferences and budgets.
Brief History of Crosley
Crosley’s origins trace back to 1920, founded by Powel Crosley Jr. initially as the Crosley Radio Corporation in Cincinnati, Ohio. They quickly became a household name in radio manufacturing, pioneering affordable radios for the masses.
Post-World War II, Crosley shifted focus, briefly venturing into automobile production. However, they are most famously remembered for their affordable record players during the mid-20th century, bringing music into countless homes.
While the original company underwent changes, the Crosley brand was revived in the 21st century, capitalizing on the vinyl resurgence with a renewed focus on stylish and accessible record players, like the Cruiser Plus and Voyager models.
Popular Crosley Models (as of 02/07/2026)
As of today, February 7th, 2026, Crosley boasts a diverse lineup, with several models consistently ranking as customer favorites. The Crosley CR46 remains a classic, alongside the CROSLEY CR 54 CD, offering added functionality. The CROSLEY CR74-S and Crosley CR89 continue to appeal to retro enthusiasts.
More recent models like the CROSLEY CR703 and CROSLEY CR8005A provide modern features; The Crosley Voyager, available in both manual and semi-automatic versions (like the Mercury), is highly sought after. The Crosley C62C, a HiFi system with Bluetooth, also enjoys significant popularity.
Understanding Crosley Record Player Components
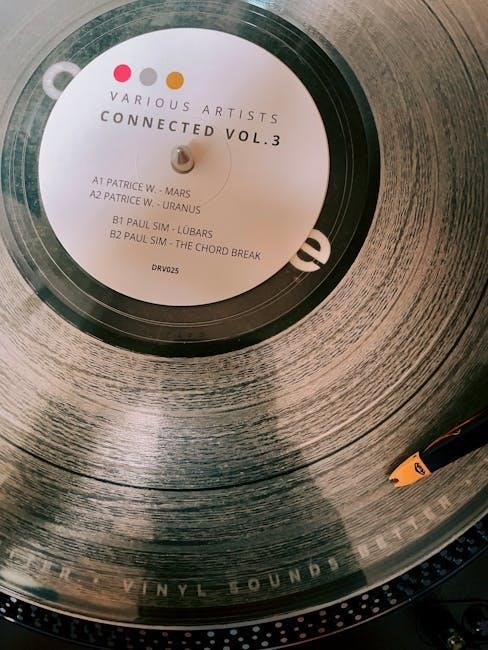
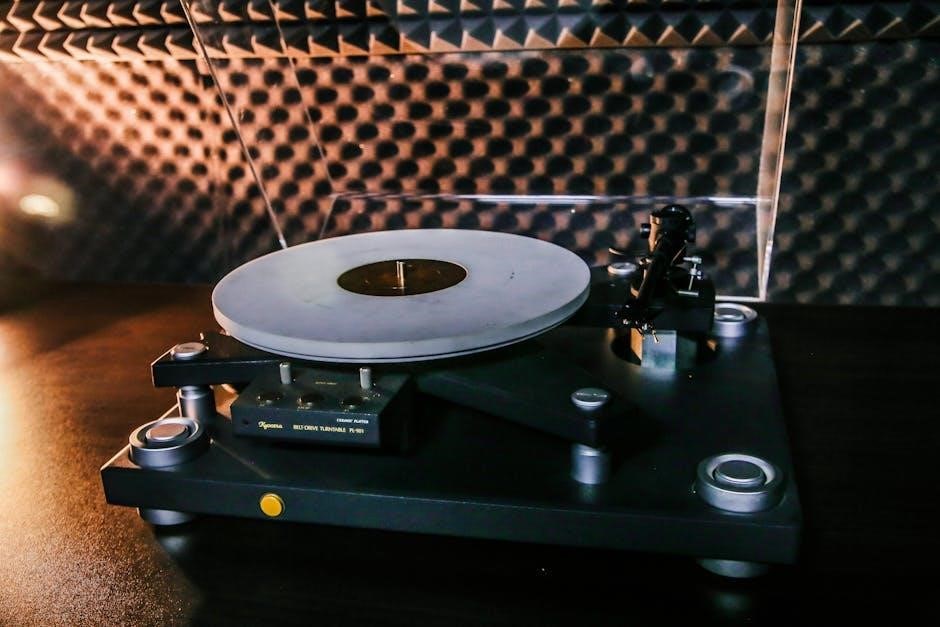
Crosley record players feature essential parts: a turntable with a tonearm, platter, and cartridge, paired with a speaker system for complete audio enjoyment.
Turntable Parts: Tonearm, Platter, Cartridge
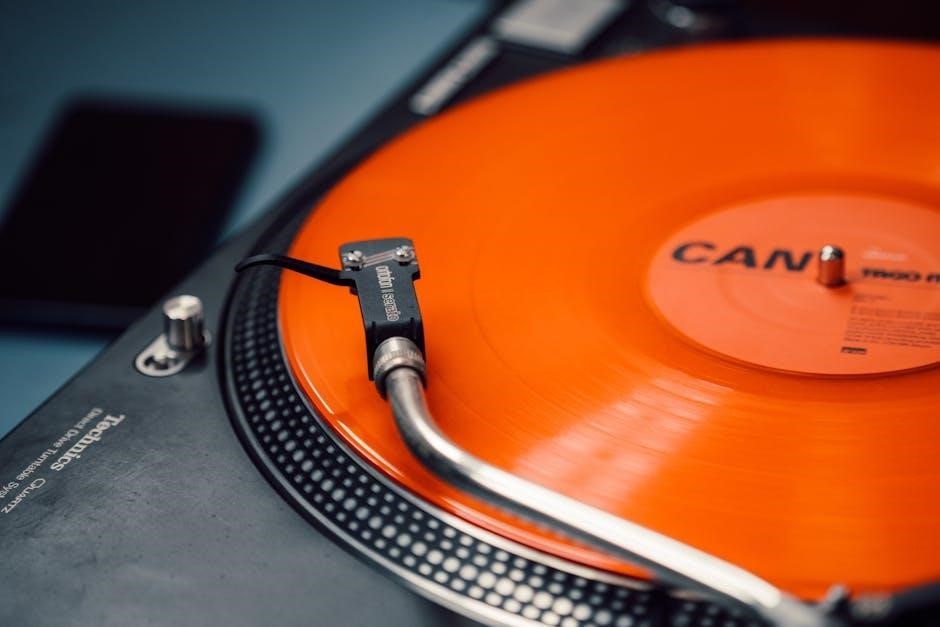
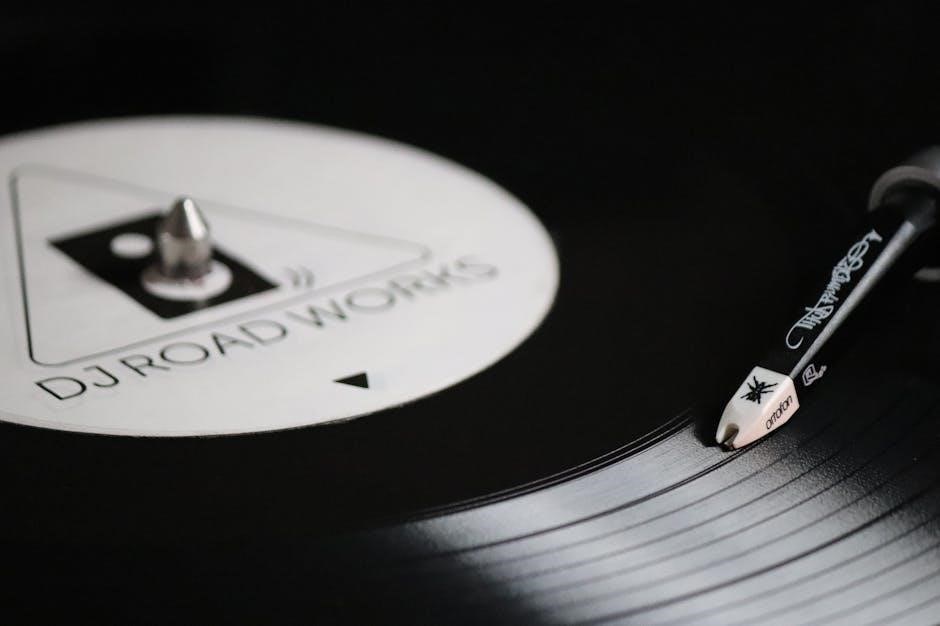
The tonearm holds the cartridge and guides it across the record’s grooves, crucial for accurate tracking. The platter is the rotating disc where the vinyl record rests during playback, ensuring consistent speed. The cartridge contains the stylus (needle) which vibrates as it reads the record’s grooves, converting these vibrations into an electrical signal.
Understanding these components is key to proper operation and maintenance. Some Crosley models, like the Voyager, feature adjustable tonearms, while others have fixed designs. The cartridge’s quality significantly impacts sound fidelity, and regular stylus replacement is essential for optimal performance and preventing record damage. Proper alignment of these parts ensures a clear and enjoyable listening experience.
Speaker System Overview
Crosley record players often integrate built-in speakers, offering an all-in-one listening solution. Models like the C62C boast 40W per channel, providing substantial audio output. However, the quality of these integrated speakers can vary. For enhanced sound, many Crosley players also offer RCA outputs, allowing connection to external speaker systems.
Bluetooth connectivity is a common feature, enabling wireless streaming from smartphones or tablets. Understanding the speaker system’s capabilities – whether built-in or external – is vital for optimizing sound quality. Proper speaker placement significantly impacts the listening experience, ensuring balanced and immersive audio.
Control Knobs and Buttons: Functionality
Crosley record players typically feature intuitive controls. A primary volume knob adjusts the sound level, while tone controls often manage bass and treble frequencies for customized audio. Power buttons initiate operation, and selector switches choose between playback speeds (33 ⅓, 45, and 78 RPM).
Models with Bluetooth include pairing buttons for wireless connections. Some units have auto-stop functionality, activated by a dedicated switch. Understanding each control’s purpose is crucial for optimal operation and tailoring the listening experience to individual preferences. Refer to your specific model’s manual for detailed explanations.

Setting Up Your Crosley Record Player
Initial setup involves carefully unboxing the unit, connecting it to a power source, and linking it to speakers or audio outputs for sound.
Unboxing and Initial Inspection
Carefully remove your new Crosley record player from its packaging, retaining the box and packing materials for potential future transport or warranty claims. Thoroughly inspect the unit for any visible signs of damage incurred during shipping, such as dents, scratches, or broken components. Verify that all included accessories are present – this typically includes the record player itself, a power adapter, and potentially RCA cables or a user manual. Check the stylus (needle) is securely attached to the cartridge. Consult the manual if anything appears missing or damaged; contacting customer support immediately is crucial for resolving any issues before proceeding with setup. A pristine unboxing ensures optimal performance.
Connecting to Power and Audio Output
First, connect the provided power adapter to the record player and then to a suitable electrical outlet, ensuring a secure connection. Next, for audio output, locate the RCA output jacks on the back of the player. If connecting to external speakers, use RCA cables to link the player to the speaker’s input jacks. Alternatively, utilize the built-in Bluetooth functionality (if equipped) to pair with compatible speakers or headphones. Ensure the volume on both the record player and external speakers is initially set to a low level to prevent sudden loud noises.
Speaker Placement for Optimal Sound
To achieve the best audio experience, position your speakers equidistant from the record player, forming an equilateral triangle with the listening position. Avoid placing speakers directly against walls, as this can cause sound reflections and muddiness; leave several inches of space. Elevate speakers slightly using stands or platforms to ear level for clearer sound projection. Ensure the speakers are on a stable surface to minimize vibrations. Experiment with slight adjustments to speaker angles to fine-tune the stereo image and find the sweet spot for your listening room.

Operating Your Crosley Record Player
Carefully place a vinyl record on the turntable platter and gently lower the tonearm to begin playback, adjusting volume as desired.
Placing and Playing a Record
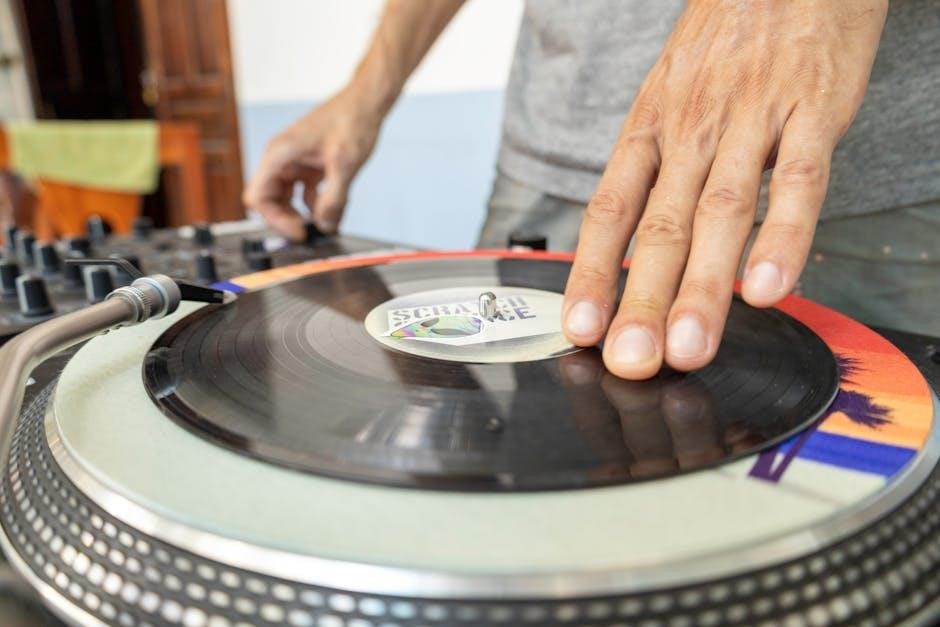
Before initiating playback, ensure the record player is powered on and stable. Gently lift the tonearm using the cueing lever, if equipped, to prevent accidental needle drops. Carefully center the vinyl record onto the turntable platter, ensuring it sits flush. Slowly lower the tonearm onto the record’s edge, allowing the needle to settle into the groove.
Avoid forcing the tonearm down, as this can damage both the record and the stylus. Once the record begins to spin and play, you can adjust the volume using the control knob. If the player has automatic stop functionality, it will lift the tonearm at the record’s end.
Adjusting the Volume and Tone
Crosley record players typically feature dedicated control knobs for volume and tone adjustment. The volume knob regulates the overall loudness of the audio output, allowing you to increase or decrease the sound level to your preference. Tone controls, often labeled as ‘bass’ and ‘treble’, enable you to fine-tune the audio frequencies.
Increasing bass enhances lower frequencies, providing a warmer sound, while boosting treble emphasizes higher frequencies for brighter clarity. Experiment with these settings to achieve the desired sound profile, considering the genre and recording quality of your vinyl records.
Using Bluetooth Connectivity (if applicable)
Many modern Crosley record players, such as the C62C, incorporate Bluetooth functionality, allowing wireless connection to smartphones, tablets, or other Bluetooth-enabled devices. To pair, activate Bluetooth on your device and select the Crosley player from the available devices list. Once connected, you can stream music wirelessly to the record player’s speakers.
Conversely, some models also support Bluetooth from the record player, enabling you to stream the vinyl audio to external Bluetooth speakers or headphones. Refer to your specific model’s manual for detailed pairing instructions and compatibility information.
Troubleshooting Common Issues
Common problems include no sound, skipping records, or a non-spinning turntable; checking connections, the needle, and power are initial troubleshooting steps to resolve these issues.
No Sound Output
If you experience no sound, begin by verifying the power connection to both the record player and any connected speakers. Ensure the volume knob isn’t set to its lowest setting and that the correct audio input is selected on your amplifier or speakers.
Check the RCA cables connecting the turntable to your audio system; ensure they are securely plugged in at both ends. If using Bluetooth, confirm the record player is properly paired with your device and the volume is audible on both. A faulty needle or cartridge can also cause silence, so inspect these components.
Finally, test with a different record and audio cable to isolate the problem. If issues persist, consult the specific model manual for further assistance.
Skipping or Repeating Sections
Record skipping or repeating often indicates a problem with the tracking force or the condition of the vinyl record itself. First, inspect the record for scratches, dust, or warping, as these can cause the needle to jump. Clean the record thoroughly with a record brush before playing.
If the record is clean, check the tonearm balance and ensure the tracking force is appropriately set (if adjustable on your model). A lightweight tonearm may struggle to track properly. Also, verify the anti-skate control is correctly adjusted to prevent uneven pressure.
Consult your model’s manual for specific guidance on these adjustments.
Turntable Not Spinning
If your Crosley record player isn’t spinning, first confirm it’s properly connected to a power source and the outlet is functioning. Check the power adapter for any damage. Next, ensure the drive belt (if your model uses one) is correctly positioned around the motor pulley and the platter’s inner rim.
A loose or broken belt is a common cause of this issue. If the belt appears intact, gently try spinning the platter by hand; it should rotate freely. If it doesn’t, the motor may be faulty.
Refer to your specific model’s manual for belt replacement instructions.
Crosley Record Player Maintenance
Regular cleaning, stylus replacement, and dust cover care are essential for maintaining your Crosley record player’s performance and extending its lifespan, as per the manual.
Cleaning the Record Player
To ensure optimal performance and longevity, regularly clean your Crosley record player. Begin by disconnecting the power. Gently dust the exterior with a soft, dry cloth to remove loose particles. For the platter, use a slightly damp cloth – avoid getting liquid near the spindle or internal components.
The tonearm and cartridge require delicate cleaning; a soft brush can remove dust. Never use abrasive cleaners or solvents. Clean the dust cover with a plastic polish designed for delicate surfaces. Regularly cleaning prevents dust buildup, which can affect sound quality and potentially damage the player’s mechanisms, as detailed in the manual.
Replacing the Needle/Stylus
The needle, or stylus, is a crucial component and requires periodic replacement to maintain sound quality and prevent damage to your vinyl records. Consult your Crosley record player manual for the correct stylus type. Gently remove the old stylus, typically by pulling it straight forward or using a small tool (if provided).
Carefully align and insert the new stylus, ensuring it clicks securely into place. Avoid applying excessive force. A worn stylus can cause skipping, distortion, and record wear, so regular replacement is essential for both audio fidelity and record preservation.
Dust Cover Care
The dust cover protects your Crosley record player and vinyl collection from dust and debris, extending their lifespan. Clean the dust cover regularly with a soft, lint-free cloth. Avoid using abrasive cleaners or solvents, as these can scratch or damage the surface.
For stubborn smudges, lightly dampen the cloth with a mild soap and water solution, then wipe gently and dry thoroughly. Handle the dust cover with care to prevent accidental breakage or scratches. Proper dust cover maintenance ensures optimal protection and preserves the aesthetic appeal of your record player.
Specific Model Manuals & Resources
Access detailed manuals for popular Crosley models like the CR46, Voyager, and Cruiser Plus online, providing setup instructions and troubleshooting guidance for users.
Crosley CR46 Manual Information
The Crosley CR46 is a classic, sought-after turntable known for its retro aesthetic and ease of use. Its manual details setup procedures, including connecting to power and audio outputs, ensuring optimal sound quality. Users will find guidance on operating the turntable, placing records correctly, and adjusting volume controls.
The manual also covers basic troubleshooting steps for common issues like no sound or skipping records. It explains the function of control knobs and buttons, and provides insights into maintaining the unit, including cleaning and stylus care. Finding a digital copy of the CR46 manual is readily available online through Crosley’s support resources and various vinyl enthusiast websites.
Crosley Voyager Manual Information
The Crosley Voyager manual provides comprehensive instructions for setting up and operating this popular turntable model. It details the unboxing process, initial inspection, and proper connection to both power sources and audio output systems. Users will learn about speaker placement for achieving optimal sound reproduction and clarity.
The manual also offers guidance on playing records, adjusting volume and tone controls, and utilizing Bluetooth connectivity if the Voyager model supports it. Troubleshooting sections address common issues like skipping or a non-spinning turntable, alongside maintenance tips for long-lasting performance and enjoyment;
Crosley Cruiser Plus Manual Information
The Crosley Cruiser Plus manual serves as a vital resource for new owners, detailing everything from initial setup to daily operation. It guides users through unboxing, power connection, and audio output configuration, ensuring a smooth start. The manual emphasizes proper speaker placement to maximize sound quality and overall listening experience.
Crucially, it explains how to play records, adjust volume and tone settings, and leverage the Cruiser Plus’s Bluetooth capabilities for wireless connectivity. Troubleshooting sections address common problems, while maintenance instructions cover cleaning and stylus care for prolonged turntable life.
Advanced Features & Settings
Some Crosley models offer adjustable tracking force and anti-skate control, detailed in the manual, for optimal cartridge performance and record preservation.
Adjusting the Tracking Force (if applicable)
Tracking force, measured in grams, dictates how firmly the needle sits in the record groove; incorrect settings can damage vinyl or diminish sound quality. Consult your Crosley model’s manual – not all have adjustable tracking force. If yours does, locate the counterweight on the tonearm base. Rotating it adjusts the force; numbers indicate gram settings.
Start with the manufacturer’s recommended setting (often 1-3 grams) and fine-tune. Too little force causes skipping; too much wears the record. Precise adjustment requires a stylus force gauge for accurate measurement, ensuring optimal playback and extending both record and stylus lifespan. Always refer to the manual for specific instructions related to your Crosley turntable.
Anti-Skate Control (if applicable)
Anti-skate compensates for the inward pull experienced by the tonearm as it tracks a record’s groove, preventing uneven wear and distortion. Similar to tracking force, not all Crosley models feature adjustable anti-skate. If present, it’s typically a dial or weight near the tonearm base, calibrated with numerical values.
Settings generally mirror the tracking force; a setting of ‘2’ corresponds to 2 grams of tracking force. Fine-tuning may be needed – observe record wear patterns and listen for balanced stereo sound. Incorrect anti-skate can cause the tonearm to drift inward or outward. Refer to your specific Crosley manual for detailed guidance on adjustment.
Understanding Cartridge Alignment
Cartridge alignment ensures the stylus accurately tracks the record groove, minimizing distortion and wear. While many Crosley models come pre-aligned, understanding the principles is beneficial. Proper alignment involves adjusting the cartridge’s position within the headshell, using a protractor tool.
Alignment affects both channels’ sound quality; misalignment causes uneven wear and distorted audio. Advanced users might consider re-aligning if experiencing issues, but it requires precision. Consult your Crosley’s manual or online resources for specific instructions and recommended protractor templates. Incorrect alignment can damage records and the stylus.
Leave a Reply
You must be logged in to post a comment.