
Honeywell TH8321R1001 Installation Manual PDF: Article Plan
This article details the Honeywell TH8321R1001’s installation, covering everything from unboxing to programming, referencing the official PDF manual for comprehensive guidance.
The Honeywell TH8321R1001, part of the VisionPRO 8000 series, is a programmable touchscreen thermostat designed for both residential and light commercial applications. This advanced thermostat offers precise temperature control, energy savings, and enhanced comfort through customizable scheduling. It features a user-friendly interface and, importantly, includes IAQ (Indoor Air Quality) contacts for integration with whole-house air purification systems.
Available installation instructions are readily accessible in PDF format, typically around 20.3 MB in size. These manuals guide users through the entire process, from safely disconnecting the old thermostat to wiring and configuring the TH8321R1001. Some sources even highlight a simplified setup process, suggesting minimal manual intervention due to its intuitive design. The thermostat supports three-stage heating and two-stage cooling, offering versatile climate control options.
What’s Included in the Box
Upon opening a new Honeywell TH8321R1001 package, you’ll find the VisionPRO 8000 programmable touchscreen thermostat itself, the central component for controlling your HVAC system. Crucially, the box contains a backplate designed for easy wall mounting and secure wiring connections. Detailed installation instructions, often available as a downloadable PDF, are included to guide the setup process.
While specific contents may vary, expect mounting screws and wire labels to facilitate a neat and organized installation. A quick reference guide is often provided for basic operation. Notably, the TH8321R1001 features a Micro SD port, though the SD card itself may or may not be included, depending on the retailer or package. The PDF manual details utilizing this port for streamlined installer setup.

Safety Precautions
Prioritize safety during Honeywell TH8321R1001 installation. Always disconnect power to your HVAC system at the breaker box before beginning any wiring work – this prevents electrical shock. Incorrect wiring can damage the thermostat or your HVAC equipment, so double-check all connections against the provided PDF manual.
If you are uncomfortable working with electrical wiring, consult a qualified HVAC technician. Ensure the installation location is dry and free from obstructions. Avoid forcing wires into terminals; use the correct tools and wire gauge. The thermostat is intended for residential or light commercial use only. Improper installation voids the warranty and could create a fire hazard. Refer to the manual for detailed safety guidelines.
Tools Required for Installation
Successful Honeywell TH8321R1001 installation requires a few essential tools. A Phillips head screwdriver is crucial for mounting the backplate and thermostat. Wire strippers are needed to expose the correct length of wire for secure terminal connections, as detailed in the PDF manual. A small, flathead screwdriver can assist with terminal tightening.
A voltage tester verifies power is off before handling wires, ensuring safety. Labeling tape or wire labels are vital for identifying wires before disconnection – preventing confusion during reassembly. A digital level ensures the thermostat is mounted straight. Finally, access to the official installation PDF manual is paramount for accurate wiring diagrams and troubleshooting. Consider a micro SD card for simplified installer setup.
Understanding the Thermostat Terminals
The Honeywell TH8321R1001 utilizes standard thermostat terminals for compatibility. The ‘R’ terminal provides 24V power, while ‘C’ is the common wire – essential for consistent operation. ‘W’ activates heating, ‘Y’ controls cooling, and ‘G’ operates the fan. Correct identification, as shown in the installation PDF, is critical.
Beyond these basics, the TH8321R1001 features IAQ (Indoor Air Quality) contacts. These terminals facilitate connection to humidifiers, dehumidifiers, and ventilation systems. Understanding these IAQ contacts, detailed in the manual, unlocks advanced climate control. Proper wiring ensures seamless integration of these features. Always double-check terminal assignments before powering on the system.
Identifying the R, C, W, Y, and G Terminals

Accurate terminal identification is paramount during installation. The ‘R’ terminal consistently supplies 24VAC power; confirm it’s energized before proceeding. ‘C’ serves as the common wire, completing the circuit and ensuring reliable operation – often blue in color. ‘W’ activates the heating system, while ‘Y’ engages cooling. The ‘G’ terminal controls the blower fan, circulating air throughout your home.
Refer to the Honeywell TH8321R1001 installation PDF for a clear diagram illustrating these terminals. Incorrect wiring can damage your HVAC system. Double-check each connection against the manual’s illustrations before applying power. Mislabeled wires can lead to system malfunctions or safety hazards.
Understanding IAQ Contacts
The Honeywell TH8321R1001 features Integrated Air Quality (IAQ) contacts, enhancing indoor environmental control. These contacts allow connection to compatible IAQ accessories, such as humidifiers, dehumidifiers, and air purifiers; The PDF manual details specific wiring configurations for each accessory type.
IAQ contacts enable the thermostat to automatically manage humidity levels and air purification based on programmed settings or sensor readings. Proper connection ensures seamless integration and optimal performance of your IAQ system. Refer to the manual’s wiring diagrams for correct terminal assignments. Incorrect wiring can prevent IAQ features from functioning correctly or potentially damage connected devices.
Pre-Installation Checklist
Before installing your Honeywell TH8321R1001, a thorough pre-installation checklist is crucial for a smooth process. First, verify compatibility with your existing HVAC system – the PDF manual outlines supported system types. Gather all necessary tools (screwdriver, wire strippers, level – see ‘Tools Required’ section).
Critically, download and review the complete installation manual PDF for detailed wiring diagrams and safety precautions. Confirm you have identified all wires connected to your old thermostat and labeled them accurately. Ensure the HVAC system’s power is completely shut off at the breaker before commencing any wiring work. Finally, check for any required IAQ accessories and their compatibility.
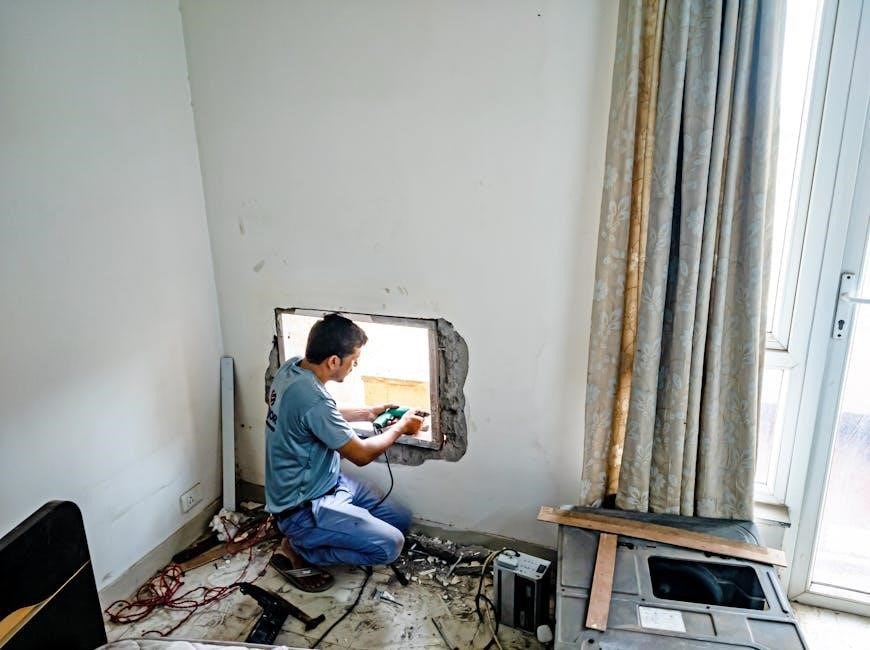
Removing the Old Thermostat
Safely removing your existing thermostat is the first physical step. The Honeywell TH8321R1001 installation PDF emphasizes prioritizing safety – always turn off power to the HVAC system at the breaker box before proceeding. Double-check with a non-contact voltage tester.
Carefully remove the old thermostat’s cover, exposing the wiring terminals. Before disconnecting any wires, meticulously label each one with the corresponding terminal designation (R, C, W, Y, G, etc.). A clear photograph can also be invaluable. Gently disconnect each wire, avoiding any strain. Retain the old thermostat’s mounting screws for potential reuse with the new backplate.
Turning Off Power to the HVAC System
Prioritizing safety is paramount when beginning the Honeywell TH8321R1001 installation. The official PDF manual explicitly instructs to completely disconnect power to your heating, ventilation, and air conditioning (HVAC) system at the breaker box. Locate the breaker controlling the HVAC unit – it’s often labeled.
Flip the breaker to the “OFF” position. To confirm power is truly off, use a non-contact voltage tester on the wires at the thermostat location. Do not proceed if the tester indicates live voltage. This crucial step prevents electrical shock and potential damage to the new thermostat or HVAC components. Double-checking ensures a safe installation process.
Disconnecting Wires and Labeling
Before removing any wires from your old thermostat, meticulous labeling is essential, as highlighted in the Honeywell TH8321R1001 installation PDF. Use the small adhesive labels often included with the new thermostat, or create your own. Carefully note which wire connects to each terminal – R, C, W, Y, and G are common.
Gently disconnect each wire, one at a time, and immediately affix a corresponding label. A photograph of the existing wiring configuration can also serve as a valuable backup reference. Avoid letting the wires fall back into the wall. Proper labeling prevents incorrect wiring during the installation of the new Honeywell thermostat, ensuring correct system operation.
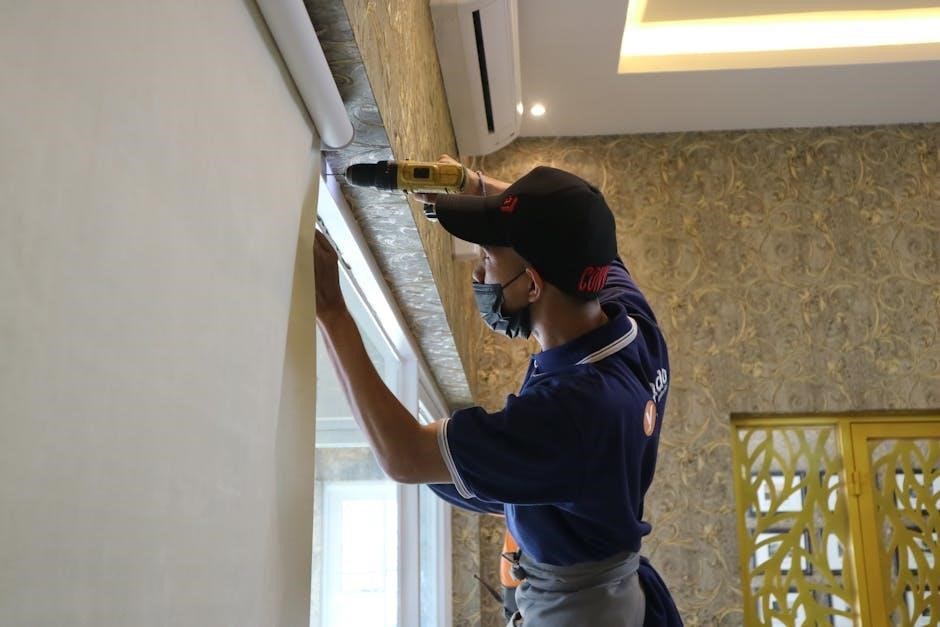
Installing the Backplate
The Honeywell TH8321R1001 installation PDF emphasizes secure backplate mounting for stable thermostat operation. Position the backplate on the wall where the old thermostat was, ensuring it’s level. Use the provided screws and wall anchors if necessary, particularly if mounting to drywall.
Drill pilot holes if needed to simplify screw insertion and prevent wall damage. The backplate should sit flush against the wall. Verify stability before proceeding. A properly installed backplate provides a solid foundation for the thermostat and facilitates easy wiring connections. Refer to the manual’s diagrams for correct screw placement and backplate orientation.
Wiring the Honeywell TH8321R1001
The Honeywell TH8321R1001 installation PDF details wiring for both conventional and heat pump systems. Carefully match labeled wires from your old thermostat to the corresponding terminals on the TH8321R1001 backplate – R, C, W, Y, and G are crucial.
Heat pump systems require specific wiring configurations, detailed in the manual’s diagrams. Ensure wires are securely inserted into the terminals; loose connections can cause malfunctions. The manual highlights the importance of the ‘C’ wire for consistent power. If you lack a ‘C’ wire, consult a professional for assistance. Double-check all connections against the wiring diagram before proceeding.
Wiring for Conventional Systems (Heat/Cool)
The Honeywell TH8321R1001 installation PDF outlines a straightforward wiring process for standard heat/cool systems. Connect the ‘R’ wire (power) to the Rh terminal for heating and Rc for cooling, or use a jumper if both are connected to a single wire. The ‘W’ wire controls heating, connecting to the W1 terminal. ‘Y’ activates cooling, connecting to the Y1 terminal. The ‘G’ wire operates the fan, connecting to the G terminal.
A common wire (‘C’) is essential for consistent power. Without it, the thermostat may not function correctly. Refer to the manual’s diagrams for visual guidance. Securely insert each wire into its designated terminal to prevent loose connections and ensure reliable operation. Always verify wiring before powering on the system.
Wiring for Heat Pump Systems
The Honeywell TH8321R1001 installation PDF details heat pump wiring, which differs from conventional systems. Connect ‘R’ to Rh/Rc, potentially using a jumper. ‘Y’ controls cooling and reversing valve energization. ‘W’ handles auxiliary/emergency heat. ‘G’ operates the fan. Crucially, heat pump systems often require the ‘O/B’ terminal for reversing valve control – consult the manual to determine if your system uses ‘O’ (energize to cool) or ‘B’ (energize to heat).
The ‘C’ wire remains vital for consistent power. Proper configuration of the ‘O/B’ terminal is critical for correct heating and cooling operation. Double-check the wiring diagram in the PDF manual specific to your heat pump type before powering on the system to avoid damage.
Attaching the Thermostat to the Backplate
The Honeywell TH8321R1001 installation PDF guides users through securely attaching the thermostat body to the previously installed backplate. Typically, this involves aligning the thermostat with the backplate and gently pressing until it clicks into place. Ensure all wires are neatly tucked inside the wall opening before attaching the thermostat to prevent pinching or damage.
The manual emphasizes verifying a snug fit; a loose connection can cause intermittent operation or display issues. Some models may have small screws for added security, detailed in the PDF. Avoid excessive force – if it doesn’t easily click, re-check wire placement and alignment. A secure attachment is crucial for reliable performance.
Powering On and Initial Setup
The Honeywell TH8321R1001 installation PDF details restoring power to your HVAC system after wiring. Upon powering on, the thermostat’s touchscreen display will illuminate, initiating the initial setup process. The manual stresses following the on-screen prompts carefully. This typically includes language selection, date and time configuration, and system type identification (heat pump or conventional).
Many users appreciate the “plain language setup” mentioned in resources, minimizing the need for extensive manual reading. The micro SD port, highlighted in documentation, facilitates quick installer setup. The PDF guides users through verifying correct operation of heating and cooling stages during this initial phase, ensuring proper functionality before programming schedules.
Setting the Date and Time
The Honeywell TH8321R1001 installation PDF emphasizes accurate date and time settings as crucial for proper scheduling. Following power-up and initial setup, the thermostat prompts the user to input this information via the touchscreen interface. The manual provides clear, step-by-step instructions for navigating the menu options to adjust both the date and time.
Correct settings are vital for the programmable schedules to function as intended, ensuring energy savings and comfort. The PDF notes that some models may automatically synchronize time via internet connection if configured. Users should verify the accuracy after setup, as incorrect time impacts all programmed events. The intuitive interface aims to simplify this process, even for those unfamiliar with similar devices.
Configuring System Type (Heating & Cooling)
The Honeywell TH8321R1001 installation PDF details configuring the system type – essential for correct operation. The thermostat supports conventional heating/cooling systems and heat pump setups. The manual guides users through a menu-driven process to select the appropriate system type during initial setup. Accurate selection ensures the thermostat controls heating and cooling functions correctly.
Incorrect configuration can lead to inefficient operation or even damage to the HVAC system. The PDF clearly outlines the differences between system types and provides visual aids to help users identify their specific setup. Options include forced air, hot water, and radiant heat. Following these steps, the thermostat optimizes performance based on the chosen system, maximizing comfort and energy savings.
Programming the Schedule
The Honeywell TH8321R1001 installation PDF emphasizes the thermostat’s programmable schedule feature for energy efficiency. Users can create customized schedules with different temperatures for various times of the day, optimizing comfort and reducing energy consumption. The manual details how to set “Wake,” “Leave,” “Return,” and “Sleep” periods, tailoring the schedule to individual lifestyles.

Understanding programmable schedules is key to maximizing savings. The PDF provides step-by-step instructions and screenshots, simplifying the process. Users can create unique schedules for weekdays and weekends, accommodating varying routines. The thermostat’s touchscreen interface makes programming intuitive. Properly configured schedules ensure the system only operates when needed, lowering utility bills and enhancing home comfort.
Understanding Programmable Schedules
The Honeywell TH8321R1001’s installation PDF highlights programmable schedules as a core energy-saving feature. These schedules allow users to define different temperature settings for specific times and days. The manual explains the concept of “periods” – typically Wake, Leave, Return, and Sleep – each associated with a desired temperature. Understanding these periods is crucial for effective programming.
The PDF clarifies that schedules can be customized for weekdays and weekends, accommodating diverse routines. It emphasizes the benefit of lowering temperatures while away or asleep, and raising them before arrival or waking up. The thermostat remembers these settings, automatically adjusting the HVAC system. Properly utilizing programmable schedules significantly reduces energy waste and lowers monthly heating and cooling costs, as detailed in the manual.

Setting Different Temperatures for Different Times
The Honeywell TH8321R1001’s installation PDF guides users through setting distinct temperatures for each programmed period. Accessing the schedule settings via the touchscreen interface allows for precise adjustments. The manual details how to navigate to each period (Wake, Leave, Return, Sleep) and input the desired heating and cooling temperatures. It stresses the importance of considering comfort levels and energy conservation when selecting these values.
The PDF explains that temporary overrides are possible, allowing for immediate temperature adjustments without altering the programmed schedule. These overrides can be set for a specific duration. The manual also clarifies how to copy temperature settings from one day to another, streamlining the programming process. Consistent application of these settings optimizes comfort and minimizes energy consumption, as outlined in the provided documentation.
Utilizing IAQ (Indoor Air Quality) Features
The Honeywell TH8321R1001 installation PDF highlights its integrated Indoor Air Quality (IAQ) contacts, enabling connection to compatible air purification or ventilation systems. The manual details how these contacts function, allowing the thermostat to trigger operation based on pre-defined conditions. Users can configure the IAQ settings to activate a whole-house fan or dehumidifier, improving indoor comfort and air quality.
The PDF explains how to access the IAQ menu on the touchscreen and customize the activation parameters. It emphasizes the benefits of utilizing these features for allergy sufferers or those concerned about indoor pollutants. Proper configuration, as outlined in the manual, ensures optimal performance of connected IAQ devices. The thermostat’s ability to integrate with these systems provides a comprehensive approach to home environmental control.
Troubleshooting Common Issues
The Honeywell TH8321R1001 installation PDF provides a dedicated troubleshooting section addressing frequent user concerns. Common issues like unresponsive touchscreens, incorrect temperature readings, or communication failures with HVAC systems are covered. The manual guides users through diagnostic steps, including verifying wiring connections and checking power supply. It details how to reset the thermostat to factory defaults if necessary.
The PDF also addresses error codes displayed on the screen, offering explanations and suggested solutions. It emphasizes the importance of consulting a qualified HVAC technician for complex problems. Simple fixes, such as replacing batteries or ensuring proper airflow, are clearly outlined. Following the troubleshooting steps in the manual can often resolve issues quickly, minimizing downtime and ensuring optimal thermostat performance.
Accessing the Micro SD Port
The Honeywell TH8321R1001 installation PDF highlights the thermostat’s convenient Micro SD port feature. This port simplifies installer setup and configuration, allowing for quick data transfer of settings and schedules. The manual details the port’s exact location on the device, typically accessible after removing the thermostat faceplate.
It explains how to properly insert and remove a Micro SD card, emphasizing the correct orientation. The PDF clarifies that the SD card is used for uploading pre-configured settings, streamlining the installation process for professionals. It also notes compatibility requirements for SD card size and format. Utilizing the Micro SD port significantly reduces on-site programming time, enhancing efficiency and accuracy during installation.
Honeywell TH8321R1001 Specifications
The Honeywell TH8321R1001 installation PDF provides a detailed list of the thermostat’s technical specifications. This includes its operating temperature range, power requirements (typically 24VAC), and display resolution. The document specifies compatibility with three-stage heating and two-stage cooling systems, alongside IAQ (Indoor Air Quality) contact support.
Dimensions and weight are also listed, aiding in physical installation planning. The PDF outlines the thermostat’s communication protocols and supported accessories. It details the memory capacity for scheduling and the number of programmable periods available. Understanding these specifications ensures proper system integration and optimal performance, as outlined in the official Honeywell documentation.
Where to Find the Official PDF Manual
The official Honeywell TH8321R1001 installation PDF manual is readily accessible through Honeywell’s official website. A direct search using the model number – TH8321R1001 – will lead you to the downloadable document. Several third-party websites also host the manual, offering free access without requiring registration. However, always prioritize downloading from Honeywell’s site to ensure you have the most current and accurate version.
Links to the PDF are frequently found on HVAC supply websites and forums dedicated to home automation. Alpine Home Air Products also provides a link to the 20.3 MB PDF. Verifying the file size and source is recommended to avoid potentially outdated or compromised files.
Warranty Information
Honeywell provides a warranty for the TH8321R1001 thermostat, though specific terms and duration can vary based on the point of purchase and regional regulations. Generally, Honeywell warranties cover defects in materials and workmanship under normal use. It’s crucial to retain your proof of purchase, such as a receipt or invoice, as this is typically required to make a warranty claim.

The warranty doesn’t usually cover damage resulting from improper installation, misuse, abuse, or unauthorized modifications. Refer to the official Honeywell documentation – often included within the product packaging or available on their website – for the complete warranty details. Contacting Honeywell support directly is the best way to confirm your specific warranty coverage.
Contacting Honeywell Support
For assistance with your Honeywell TH8321R1001 thermostat, Honeywell offers multiple support channels. Their official website is a primary resource, providing access to FAQs, troubleshooting guides, and downloadable manuals, including the PDF installation guide. You can typically find a “Contact Us” section with options for phone support and online chat.
Direct phone support allows for real-time assistance with technical issues or warranty claims. Online chat provides a convenient way to get quick answers to specific questions. When contacting support, have your thermostat’s model number (TH8321R1001) readily available, along with details about your issue. Exploring the Honeywell Home community forums can also offer peer-to-peer support and solutions.
Leave a Reply
You must be logged in to post a comment.