
Lowrance Hook 4x GPS Manual: A Comprehensive Guide
This manual details the Lowrance Hook 4x GPS, covering setup, operation, troubleshooting, and maintenance for optimal performance on the water.
The Lowrance Hook 4x GPS is a combined depth finder and GPS navigator, specifically engineered for anglers seeking precise underwater information and navigational capabilities. This device, part of the Hook series, offers a user-friendly interface and reliable performance. It’s designed to help locate fish, map underwater structures, and navigate waterways effectively.
This manual provides comprehensive guidance on utilizing all features, from initial setup and understanding the display, to advanced sonar and GPS functionalities. Whether you’re a seasoned angler or new to fish finding technology, this guide will unlock the full potential of your Lowrance Hook 4x GPS.
Key Features and Benefits
The Lowrance Hook 4x GPS boasts several key features, including a vibrant 4.3-inch color display for clear visibility, and a built-in GPS antenna for accurate positioning and route tracking. Its sonar capabilities deliver detailed underwater imaging, identifying fish and structure with precision.
Benefits include easy navigation with waypoint creation and route planning, enhanced fish finding through advanced sonar settings, and a user-friendly interface for simple operation. The Bullet transducer provides reliable sonar performance, while software update capabilities ensure your device remains current with the latest features.
Setting Up Your Hook 4x GPS
Proper setup involves unboxing, mounting the display, connecting the power supply, and installing the transducer for optimal sonar and GPS functionality.
Unboxing and Component Check
Upon receiving your Lowrance Hook 4x GPS, carefully inspect the box for any signs of damage during shipping. Once opened, verify all components are present. You should find the Hook 4x display unit, a mounting bracket, a power cable, a transducer with its cable, and this user manual.
Confirm the transducer is the correct model (Bullet type is common). Check for any visible damage to the display screen or cables. Retain the original packaging for potential warranty claims or returns. A quick inventory ensures a smooth setup process and avoids frustration later. Refer to the included parts list within the manual for a complete component overview.
Mounting the Display Unit
Securely mounting your Lowrance Hook 4x GPS is crucial for safe and reliable operation. Begin by selecting a stable location, avoiding direct sunlight and excessive vibration. Utilize the included mounting bracket, ensuring it’s firmly attached to a suitable surface using appropriate screws (not always supplied).
Adjust the bracket to achieve the desired viewing angle; Consider cable routing to prevent strain or damage. Tighten all screws securely, but avoid over-tightening. Double-check the unit’s stability before powering on. Proper mounting protects the display and ensures optimal visibility while navigating.
Connecting the Power Supply
Proper power connection is vital for the Lowrance Hook 4x GPS’s functionality. Locate the power cable and connect the red wire to the positive (+) terminal and the black wire to the negative (-) terminal of your boat’s 12-24V DC power source. Ensure a secure and waterproof connection to prevent corrosion and power interruptions.
A fuse is typically included in the power cable; verify its amperage rating matches your boat’s electrical system. Avoid reverse polarity connections, which can damage the unit. Once connected, test the power supply before proceeding with further setup.
Transducer Installation and Setup
Correct transducer installation is crucial for accurate sonar readings on your Lowrance Hook 4x GPS. Choose a location on your boat’s hull that provides consistent water flow, avoiding areas with excessive turbulence. Securely mount the transducer using appropriate hardware, ensuring it’s flush with the hull for optimal performance.
Connect the transducer cable to the designated port on the display unit. Within the sonar settings, configure the transducer type and depth range to match your boating environment. Verify the sonar signal strength for clear and reliable readings.

Understanding the User Interface
The Lowrance Hook 4x GPS features an intuitive interface with a main menu, display icons, and adjustable settings for a personalized user experience.
Powering On and Initial Setup
To power on your Lowrance Hook 4x GPS, press the LIGHT/POWER button. The unit will initiate a startup sequence, displaying the Lowrance logo and then prompting for initial setup.
During the initial setup, you’ll be asked to select your preferred language, date, and time format. Crucially, you must then configure the GPS source within the system settings menu. Select the appropriate GPS source and confirm with the ENTER key.
Ensure the transducer is properly connected and the power supply is secure before proceeding.
Navigating the Main Menu
The Lowrance Hook 4x GPS utilizes a straightforward menu system accessed via the directional pad and ENTER button. Pressing the MENU button reveals the main menu, presenting options like Sonar, GPS, Chart, Setup, and Pages.
Use the up/down arrows to highlight your desired option, then press ENTER to select it. Within each menu, further sub-menus are navigated in the same manner. To return to the previous menu, press the MENU button again.
Familiarize yourself with the menu structure for efficient access to settings and features.
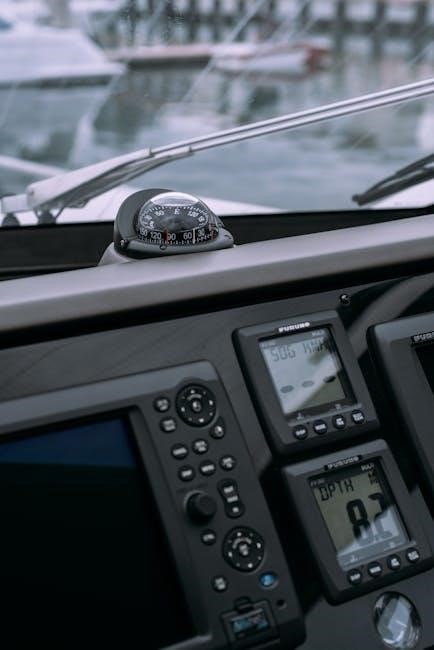
Understanding the Display Icons
The Lowrance Hook 4x GPS display employs various icons to convey crucial information. A fish icon indicates sonar returns potentially representing fish, while bottom contour is shown with shading.
GPS-related icons display position, signal strength, and waypoint data. A compass icon shows heading, and a speed indicator displays boat speed. Battery level is indicated by a battery icon.
Refer to the manual’s icon legend for a complete explanation of each symbol. Recognizing these icons allows for quick interpretation of data and informed navigation.
Adjusting Display Settings (Brightness, Contrast)
Optimizing the display for varying light conditions is crucial for clear visibility. Access the settings menu to adjust brightness and contrast levels on your Lowrance Hook 4x GPS.
Increase brightness for sunny conditions and decrease it for nighttime use to reduce glare. Contrast adjustments fine-tune the clarity of the displayed information, ensuring easy interpretation of sonar returns and chart details.
Experiment with different settings to find the optimal balance for your viewing preference and ambient light.

Sonar Functionality
Explore the sonar capabilities of your Lowrance Hook 4x GPS, including range selection, frequency settings, and interpreting returned sonar images for fish detection.
Understanding Sonar Ranges and Frequencies
The Lowrance Hook 4x GPS utilizes various sonar ranges and frequencies to provide detailed underwater imaging. Shorter ranges (e.g., 30ft, 100ft) offer higher resolution for close-range targets, ideal for detailed structure viewing. Longer ranges (e.g., 600ft) are better for covering larger areas and locating fish at greater depths.
Frequency impacts detail and penetration. Higher frequencies (200kHz) deliver finer detail but have less penetration, suitable for clear water and shallow depths. Lower frequencies (50kHz) penetrate deeper but offer less detail, best for murky water and deeper fishing. Understanding these relationships allows you to optimize sonar settings for your specific fishing environment and target species, maximizing the effectiveness of your Hook 4x GPS.
Interpreting Sonar Images and Readings
The Lowrance Hook 4x GPS displays sonar information as images and readings, requiring interpretation for effective fishing. Strong sonar returns indicate solid objects like structure or fish. Arches typically represent fish swimming through the sonar beam, with the peak indicating the fish’s position.
Understanding signal strength and clarity is crucial. Faint or broken signals may indicate weak returns or interference. Adjusting gain settings can enhance weaker signals, but be cautious of creating false readings. Learn to differentiate between true targets and noise to accurately assess the underwater environment and locate productive fishing spots using your Hook 4x GPS.
Adjusting Sonar Settings (Gain, Depth Range)
Optimizing sonar performance on your Lowrance Hook 4x GPS involves adjusting gain and depth range. Gain controls the receiver’s sensitivity; higher gain amplifies weaker signals, useful in deep water or for detecting subtle structure, but can also introduce noise. Depth range sets the maximum distance the sonar will scan.
Automatic settings are a good starting point, but manual adjustments are often necessary. Increase gain cautiously to avoid clutter. Select a depth range appropriate for the water you’re fishing – too large, and targets appear faint; too small, and you miss deeper structures. Experiment to find the optimal settings for clear, detailed readings.
Using Advanced Sonar Features
The Lowrance Hook 4x GPS offers advanced sonar features beyond basic depth readings. These include Fish ID, which categorizes sonar returns as fish, and bottom lock, displaying the bottom even while the boat moves. StructureScan compatibility (with optional transducer) provides detailed side-imaging views.
Explore the sonar menu to access these options. Experiment with different settings to understand their impact on the displayed image. Utilize the split-screen functionality to view multiple sonar views simultaneously. Mastering these features enhances your ability to locate fish and identify underwater structures effectively.

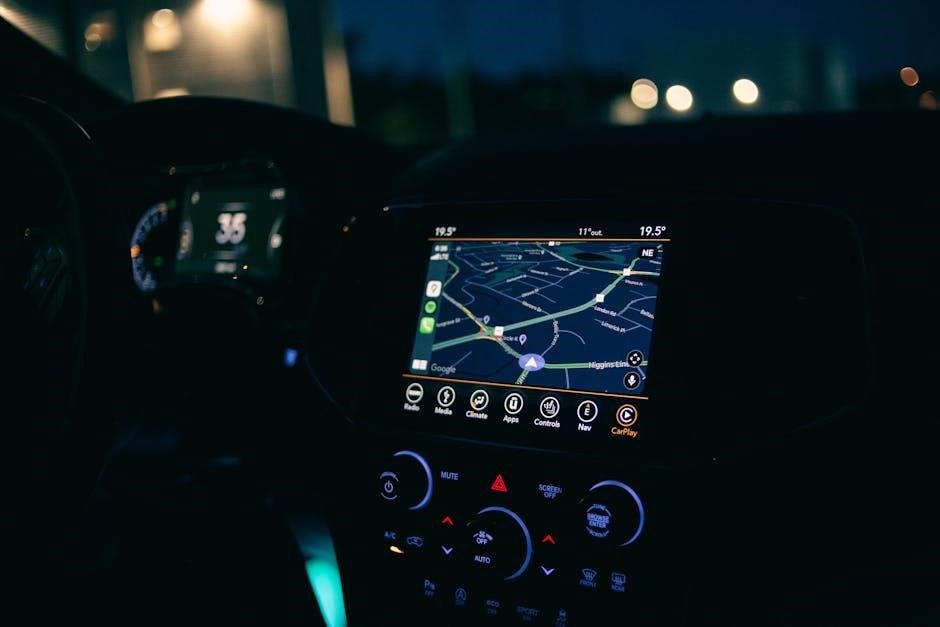
GPS Navigation Features
Utilize the integrated GPS to pinpoint location, create waypoints, and plan routes for efficient navigation and successful fishing expeditions.
Acquiring GPS Signal
To establish a GPS connection, ensure the unit has a clear view of the sky, unobstructed by trees, buildings, or other potential interference. Power on the Hook 4x, and navigate to the GPS settings within the main menu. Select the appropriate GPS source if multiple options are available.
The display will indicate signal strength and the number of satellites acquired. Initial acquisition may take several minutes, especially after powering on or relocating the unit. A strong signal is crucial for accurate positioning. If signal acquisition is slow, try relocating to an open area. Verify the antenna connection for optimal performance.
Creating and Saving Waypoints
To mark a location, navigate to the desired position on the chartplotter display using the cursor keys. Press the designated “Mark” or “Waypoint” button to create a new waypoint at the current coordinates. You’ll then be prompted to enter a name or identifier for the waypoint.
Use the keypad to input a descriptive name, making it easily recognizable. Confirm the name and save the waypoint. Saved waypoints are stored in the unit’s memory and can be recalled for future navigation. Regularly backing up your waypoints is recommended to prevent data loss.
Navigating to Waypoints
To navigate to a saved waypoint, access the waypoint list from the main menu. Select the desired waypoint from the list using the cursor keys and press the “Go To” or “Navigate” button. The Hook 4x GPS will then display a course line indicating the direction and distance to the selected waypoint.
The unit will continuously update the course line as you travel, providing real-time guidance. Adjust your heading as needed to follow the course line and reach your destination. Monitor the distance remaining and estimated time of arrival displayed on the screen.
Using the Route Planning Feature
The Lowrance Hook 4x GPS allows creating routes by stringing together multiple waypoints. Access the route creation mode through the main menu, then add waypoints to your route in the desired sequence. You can review the route on the chartplotter display before activating it for navigation.
Once a route is active, the unit will guide you from waypoint to waypoint, displaying the course line and distance to the next destination. You can modify or delete routes as needed; This feature is ideal for planning longer journeys with multiple stops.
Advanced Features and Settings
Explore software updates, data transfer options, customizable display layouts, and chartplotter settings to personalize your Lowrance Hook 4x GPS experience.
Software Updates and Firmware
Maintaining up-to-date software is crucial for optimal performance and access to the latest features on your Lowrance Hook 4x GPS. Regularly check the official Lowrance website (www.lowrance.com) for available firmware updates. These updates often include bug fixes, performance enhancements, and new functionalities.
The update process typically involves downloading the firmware file to a microSD card, inserting the card into your Hook 4x GPS unit, and following the on-screen prompts; Always ensure a stable power supply during the update to prevent data corruption. Refer to the Lowrance support documentation for detailed, step-by-step instructions specific to your unit’s software version.
Data Transfer and Storage
Your Lowrance Hook 4x GPS utilizes microSD cards for data storage and transfer. This includes saved waypoints, routes, sonar recordings, and software updates. Ensure you use a compatible microSD card, formatted correctly according to Lowrance specifications (refer to the manual for details).
To transfer data to a computer, remove the microSD card from the unit and insert it into a card reader. You can then copy files directly or use Lowrance software for more advanced data management. Regularly back up your important data to prevent loss. The card’s capacity determines how much data you can store.
Customizing Display Layouts
The Lowrance Hook 4x GPS allows for personalized display configurations to suit your fishing preferences. Access the display settings menu to adjust screen brightness, contrast, and color schemes for optimal visibility in varying light conditions. You can select pre-set layouts or create custom views, choosing which sonar, GPS, and chartplotter information is displayed simultaneously.
Experiment with different split-screen options to prioritize critical data. Adjusting these settings enhances readability and improves situational awareness on the water. Remember to save your preferred layouts for quick access during future fishing trips.
Understanding Chartplotter Options
The Lowrance Hook 4x GPS integrates chartplotter functionality, displaying navigational charts for enhanced awareness. Explore options for chart orientation, north-up or course-up views, and chart detail levels to optimize map clarity. Utilize features like chart zooming and panning for closer inspection of specific areas.
The unit supports various chart formats, allowing you to load detailed coastal or inland maps. Familiarize yourself with chart symbols and legends to interpret navigational hazards and points of interest. Properly configured chart settings significantly improve safe and efficient navigation.

Troubleshooting Common Issues
This section addresses frequent problems like power failures, signal loss, and connectivity issues, offering solutions to restore functionality quickly and efficiently.
No Power or Display Issues
If your Lowrance Hook 4x GPS fails to power on, first verify the power cable connections at both the unit and the power source. Ensure the power supply is functioning correctly, potentially testing with another device. Check the fuse within the power cable; a blown fuse is a common culprit.
If the unit powers on but the display remains blank, examine the display brightness settings – it may be set too low. Try a factory reset, accessible through the settings menu, to resolve software glitches. Inspect the unit for any physical damage that could affect the display. If problems persist, consult a qualified technician for repair or replacement.
Sonar Signal Problems
Experiencing weak or absent sonar returns on your Lowrance Hook 4x GPS often indicates transducer issues. Verify the transducer is securely mounted and fully submerged in water; air bubbles can disrupt the signal. Check the transducer cable for damage – kinks or breaks can cause signal loss. Adjust sonar settings like gain and frequency to optimize performance for varying water conditions.
Interference from other marine electronics can also cause problems. Try adjusting the sonar range and ensuring the transducer is compatible with your boat’s hull material. If issues continue, a transducer replacement might be necessary.
GPS Signal Loss
If your Lowrance Hook 4x GPS loses its satellite connection, several factors could be at play. Obstructions like tall buildings, dense trees, or even heavy cloud cover can interfere with the signal. Ensure a clear view of the sky for optimal reception. Verify the GPS antenna is properly connected and functioning correctly.
Check the GPS settings within the unit to confirm the correct source is selected. Interference from other electronic devices is also possible. A software update might resolve underlying issues; consult the Lowrance website for the latest firmware.
Transducer Connectivity Issues
Experiencing problems with your Lowrance Hook 4x’s transducer? First, confirm the transducer cable is securely connected to both the display unit and the transducer itself. Inspect the cable for any visible damage, such as cuts or corrosion. Ensure the transducer is properly mounted to the hull, maintaining good contact with the water.
Try power cycling the unit – turning it off and on again. Check the sonar settings to verify the correct transducer is selected. A faulty cable or transducer may require replacement. Consult the manual for specific troubleshooting steps related to transducer identification.
Maintenance and Care
Regular cleaning with a soft cloth and proper storage will ensure the longevity and optimal performance of your Lowrance Hook 4x GPS unit.
Cleaning the Display Unit
To maintain a clear and responsive display on your Lowrance Hook 4x GPS, regular cleaning is essential. Always disconnect the power supply before commencing any cleaning procedures. Use a soft, lint-free cloth lightly dampened with a mild soap and water solution.
Avoid abrasive cleaners, solvents, or harsh chemicals, as these can damage the screen’s protective coating. Gently wipe the display in a circular motion, removing any dirt, salt spray, or fingerprints. Ensure no moisture enters any openings. After cleaning, dry the display thoroughly with a clean, dry cloth.
For stubborn stains, a specialized screen cleaner designed for electronic devices can be used, following the manufacturer’s instructions carefully.
Transducer Care and Maintenance
Proper transducer care is vital for accurate sonar readings with your Lowrance Hook 4x GPS. After each use, rinse the transducer with freshwater to remove salt, algae, and debris. Inspect the cable for any signs of damage, such as cuts or abrasions, and repair or replace it if necessary.
Avoid allowing the transducer to dry out for extended periods, as this can cause internal damage. When storing, protect the transducer from direct sunlight and extreme temperatures.
Periodically check the transducer mounting to ensure it remains secure and doesn’t interfere with boat operation.
Storage Recommendations
When storing your Lowrance Hook 4x GPS for extended periods, ensure it’s completely dry to prevent corrosion and damage. Remove the unit from direct sunlight and extreme temperatures, as these can harm the display and internal components.
Disconnect the power and transducer cables. Store the unit in a protective case or bag to shield it from dust and impacts.
Consider removing the SD card to safeguard your waypoints, routes, and software updates. Periodically check the unit during storage to ensure it remains in good condition.
Safety Precautions
Always prioritize safe boating practices while using your Lowrance Hook 4x GPS. Do not rely solely on the GPS for navigation; maintain a proper lookout and use charts.
Avoid operating or adjusting the unit while underway if it compromises safe vessel control. Ensure the unit is securely mounted to prevent damage during rough conditions.
Disconnect the power supply during electrical storms. Never attempt to disassemble or repair the unit yourself; contact qualified service personnel.
Be aware of your surroundings and comply with all maritime regulations.
Leave a Reply
You must be logged in to post a comment.